
Centerpieces play a significant role in setting the theme of a party and bringing that extra oomph to the overall decorations in a room. However, it also makes for a great senior activity as it is both fun and productive. Like other crafts, creating centerpieces results in a dopamine release making it an excellent pastime for elders looking for a therapeutic and relaxing activity that does not require them to leave the comfort of their home, especially those with mobility limitations. It is also easy on the pocket as you will find most of the materials needed for making these centerpieces lying around somewhere in your house.
Below, we have listed some of the top centerpieces ideas that are not only super easy but also extremely affordable:
Apple Frog Centerpiece
Apple frog is a delectable winter dessert, savored by both children and adults alike. Whether a holiday, birthday party, or some other special occasion, apple frog centerpieces make a topping addition to not only the decorations but also the menu as they are edible! The trick to creating an apple frog centerpiece is using icing or frosting to glue all the components and opting for an edible gel marker.
You do not have to worry about the budget when making an apple frog centerpiece as the required materials are exceedingly affordable and can be bought at low prices at a nearby stationery shop or even online.
You will need:
- Apple frog
- Plate
- Jar lid
- Old CD
- Styrofoam block
- Moss
- Dried foliage
- Glass stones
You can either make your apple frog at home or buy it from a sweetshop. Once your apple frog is ready, it is time to assemble the centerpiece. Start with placing a jar lid in the middle of a plate to make a stand. Proceed with placing an old CD on top of your lid stand to give it the look of a raised platform. Next, place the apple frog carefully on the middle down of the CD so that the platform does not buckle down under the weight of the apple frog.
Once the structure of the centerpiece is ready, it is time to adorn it with different embellishments. For this purpose, you can stick some dried foliage to a small styrofoam block and out behind the apple frog to add color to the background. Lastly, throw around a bunch of Spanish moss and a few blue glass stones or real stones. You can either use a single apple frog or display a bunch of different ones on a tray; either way, this adorable centerpiece is sure to make a smile on everyone’s face during the dread of winter!
Painted Pot Centerpiece
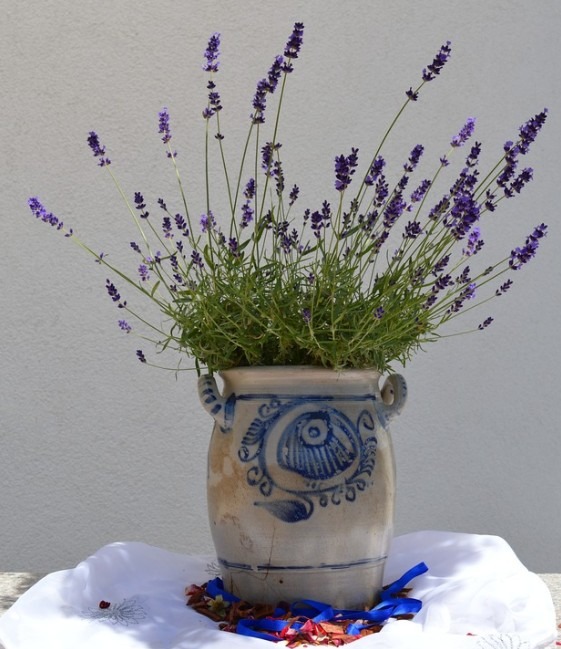
Making a painted pot centerpiece is an effective way to practice your art skills and add some vibrancy to your home decor. You can play around with different colors and designs to your liking.
You will need:
- Painted pot and stand
- Different flowers (fake or real)
- Foliage
- A glass of water (if using real flowers)
- Candleholder
- Pillar candle or taper candle (preferably flameless)
- Styrofoam block
- Peebles
Start with painting your pot or buying one that is already painted. You can either use a single color to paint your pot or use multiple bright colors to make intricate designs. Once your painted pot is dry, place the pot on its stand and put a block of styrofoam in its bottom. Next, place your favorite flowers on that styrofoam block. You can pick out flowers from your garden but if a garden is not accessible, use fake flowers as a substitute. If you are using real flowers, do not put the styrofoam in the bottom of the pot; instead, fill the painted pot with a cup of tap water. Next, fill the pot with foliage around the base of the pot and arrange the different flowers to your pleasing. You can also add some black pebbles to add some depth. Lastly, to create a whimsical effect, place a candle holder and pillar candle behind the painted pot. You can experiment with different themes and designs for your painted pot centerpiece. These look best when displayed in a set of two or three.
White Centerpiece
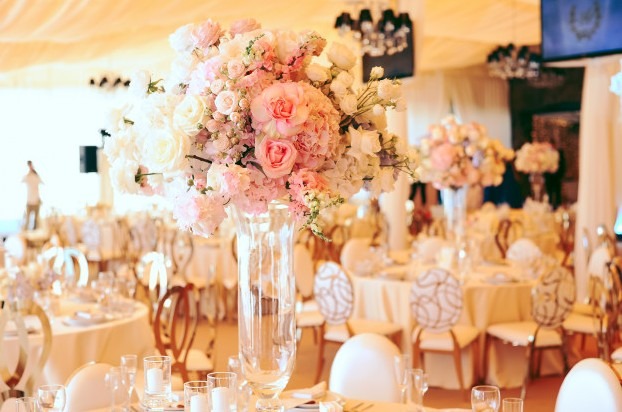
White centerpieces are the perfect choice for making your home look extra magical on Christmas or a wedding anniversary while sticking to a tight budget. Bid farewell to expensive decoration pieces and make your own white centerpieces to embellish your house. They are inexpensive, require little to no time to make, and are unparalleled in their elegance!
You will need:
- Glass plate (plastic plate can also be used)
- Tall cylinder vase (glass or plastic)
- Quartz rocks
- White flowers
- Quartz geode (optional)
- Wide wired white or silvery ribbon
- White pillar candle (preferably flameless)
First, take a glass plate and set a tall cylindrical vase on top of it. Then fill it partially with quartz stones (you can find them in a thrift store at a cheap price). If you wish to further enhance its appeal, add a quartz geode or fresh white flowers to the base as well. However, this step is totally optional and you may skip it if you do not wish to spend extra money. Next, set a white flameless pillar candle on the rocks. Lastly, take a length of wired white/silver ribbon and drape it around the arrangement. The ribbon allows the centerpiece to stand on its own. You could also opt for white artificial roses or other white flowers around the base instead of the quartz. Mix match the components to make your personalized eye-catching white centerpiece and let it be the center of everyone’s attention at your next winter-themed party!
Seashell Centerpiece
Having a beach-themed party any time soon? Planning luau or fish fry? If yes, then create a few affordable centerpieces with a beach theme to let everyone get the gist!
You will need:
- Tall cylinder vase (glass or plastic)
- Pebbles (any color of your choice)
- A dozen of different sized seashells
- Raffia
- Pillar candle and candle stand
Begin with a cylinder shaped vase and partially fill it with a layer of stones or pebbles. Now arrange about a dozen or more seashells on top of the pebbles. Although you can add shells of the same but different sized shells will add depth and dimension to the overall appearance of the centerpiece. Next, stick in a few strands of raffia and let them hang over the side. Lastly, place a pillar candle on top of the shells: a flameless candle is the safest option. Scatter a few shells outside the centerpiece as well. You can make multiple shell centerpieces and put them on a tray or large platter and scatter some sand around them.
Pumpkin Centrepiece
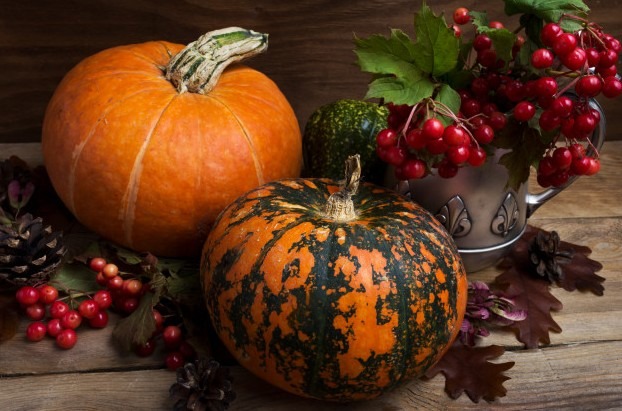
What better way to celebrate autumn than to eat a pumpkin and later make a centerpiece from it? Pumpkins centerpieces and gourd crafts are usually better suited for fall however, you can find some squash and gourds in summer as well. You can either carve the pumpkin or paint it and then fill it with dried moss or even straw. Incorporate diverse themes and play around with different ideas to make a stand-alone pumpkin centerpiece for a Halloween party. They are also very easy to make however you could ask for extra help if you feel the need!
The Takeaway
There are several ways to create exquisite centerpieces that are both affordable and easy to make. So, do not let your age be a limitation and let the artist within your take over. If you wish to explore other exciting senior activities, have a look at our Top Outdoor Activities for Seniors.