Painting Pumpkins and Gourds
Painting pumpkins and small gourds makes a fun and easy project all year round, not just in the fall. A great alternative to carving and it’s quite colorful!
Plus, you can prepare and eat it as usual when you’re done displaying…if you want to. I like to use the small sizes and any smooth gourd works great too. Have a look at some of the best pumpkin projects below.
Painting Pumpkin Projects
Two-Tone Gourd with Daisies
Making a two-tone gourd is not difficult depending on getting the right gourd for your craft. Here is a list of items that you will be needing for this project.
You Will Need:
* A two-tone gourd
* Acrylic paints in your choice of colors
* Pointed paint brush, water jar, rags
* Plastic picnic plate for a palette
First paint a few straight stems of different heights. You can also draw them on with a fine-tip marker. Add a few small leaves.
Doing the petals is a basic technique I use when painting pumpkins. I like to make 2 layers of petals. The back circle of petals is larger in size and is done in darker paint. When dry, I make the inner circle of petals in a lighter color, so it stands out. Then dab a contrasting color in the middle of the flower to form its center. Painting pumpkins also works very well to use in easy, affordable centerpieces.
Bright Floral Pumpkin
Bright Floral Pumpkin is also another type of painting which is focused on bringing a shine through the acrylics. It is yet another free-hand painting, but you can use stencils for a quick design. (I like to keep a variety of stencils around for all kinds of easy craft ideas).
We also have leaf templates you can use, and just transfer them onto the pumpkin or gourd, as with old-fashioned carbon paper. You can find them at this link. Here are the basics of what to do.
You Will Need:
* Acrylic paints, i.e., red-orange, magenta, brown, green, yellow, white
* plastic picnic plate for palette
* Brushes, both flat and pointed
* Water jar & rags
First put blobs of paint on your palette. When painting pumpkins, notice the natural shape and curve that you’re working with. Then paint a brown curvy vine with your pointed brush coming around and down the pumpkin, following its curves. I basically made a large loop.
I painted the large flower first — on top of the vine in the center of the pumpkin, in red orange, with a basic daisy formation. The longer petals in the back were painted first. When dry, I added a second layer of shorter petals in front.
Then I highlighted the petal edges with a little purple to give it a shaded look. Finally, a yellow dot for the center, and a yellow line down the center of each petal, to form a vein.
Next came smaller flowers done in magenta at various areas off the vine, with stems connecting them. These were made with just three strokes, joining at the base of the flower.
Lastly, I painted in easy leaves here and there along the vine, and by the large flower. Just a few so as not to clutter and over-do it.
When painting pumpkins like this one, I like to use two colors on the brush at the same time, to give a two-tone effect to the leaves and petals. For instance, for the leaves drag one side of the brush in white paint, and the other in green.
Then stroke on the leaves. This is sometimes called one-stroke painting. I used the same technique for the small flowers, using magenta and white on the brush.
Hanging Flower Puffs
Hanging flower puffs on a pumpkin is no big deal as these flowers were very simple to do for myself. You would use the same types of materials as above. First choose your color scheme of acrylic paints.
The easiest way to make these flowers is to dip a stiff round stippling brush into your paint then stipple (dot) on large, round circles. If you don’t have a stippling brush, just make a mass of dots with a regular pointed brush.
You can add another color on top to give a two-tone look. Then take a pointed brush and draw free-form squiggly stems coming down from the top of the pumpkin to each flower. Add a few leaves to each.
You could also have the flowers growing up from the bottom of the pumpkin, toward the top. These types of round flowers are extremely easy to paint, and I use them on all types of projects, including painting clay pots and painting on glass.
Leaf Silhouettes
Using just silhouette shapes can be very striking when painting pumpkins. It’s especially good if you want to keep it simple – in all black, for instance. Or purple.
Birds, leaves, vines, and flowers all make good designs. This sample was done in black acrylic paint.
If you want a simple project, just make fewer leaves, and make them larger. You may find you need to put two coats of paint on, for silhouettes.
Large Autumn Leaves
Making a leaf design is easy when you follow a particular pattern. Although I painted this on free hand, you can use a pattern.
Keep the three leaves in a group. Overlapping them results in a nice, tight design, rather than a scattered feel.
These kinds of leaves could also be made smaller or painted all in black for a silhouette look.
This pumpkin was very smooth, and I applied three coats of thin paint.
Get All the Products You Need
We have listed down a few products below which would be essential for your different types of Pumpkin and Gourds projects. You can get all of them at the comfort of your home by simply ordering via Amazon.com
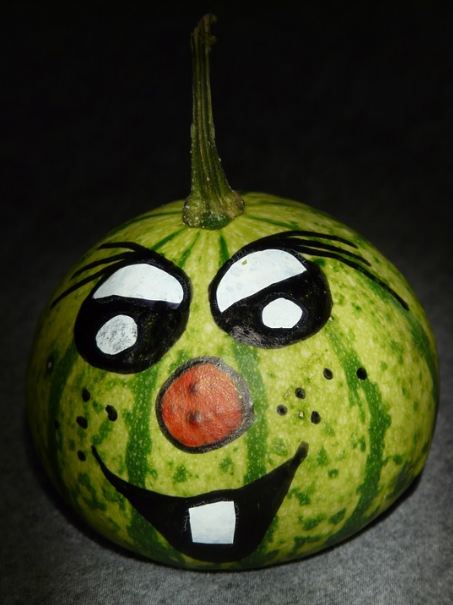
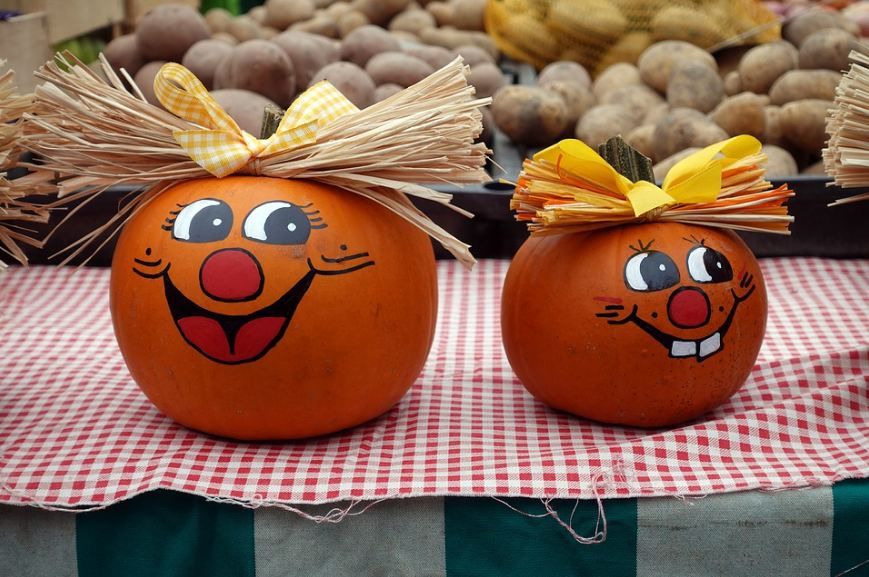
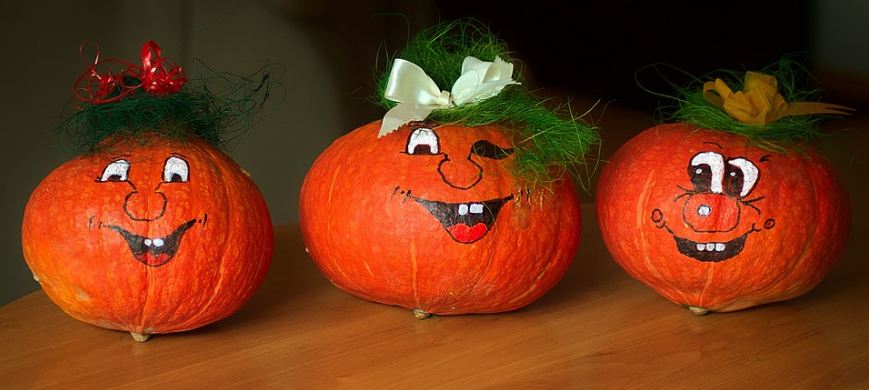
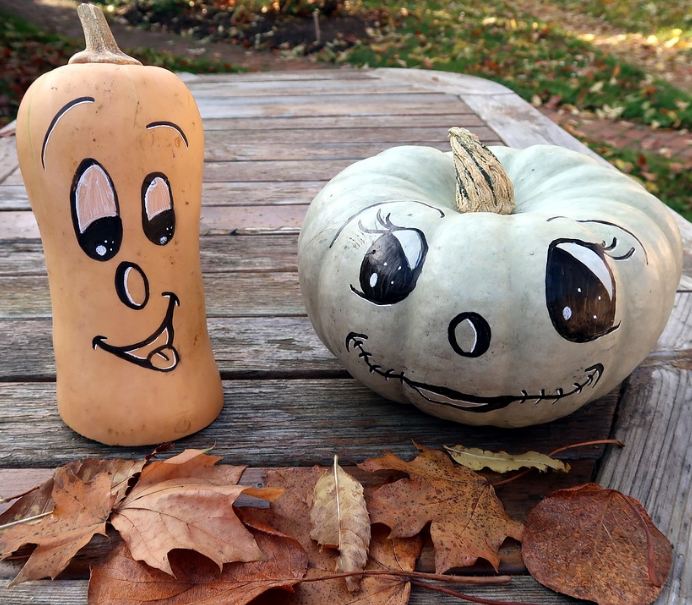
Pumpkin Faces
Halloween is an especially great time for painting pumpkins with fun faces and they don’t all have to be scary! Why not add a little autumn cheer. Making faces is very simple if you think in terms of using basic shapes — like circles and ovals, as with the eyes, cheeks, and nose.
A crooked mouth and a few swooshes for the hair will do just fine. The less “perfect,” the more amusing it is, in fact. You could also glue on very large googly eyes from the craft store. You could also glue on a little moss on the top of the head for hair, and even add an old straw hat.
Conclusion
We hope we have provided you ample ideas on how to utilize a Pumpkin in the most interesting manner. Be sure to get the right accessories first.
Some folks, though, do like to carve pumpkins at any age, from basic to extravagant. You may have a resident artist who can make a great one.
These make really nice senior activities but if you are looking for more, you can head over to our activity ideas for the elderly that have all the interesting activities for seniors at one page.